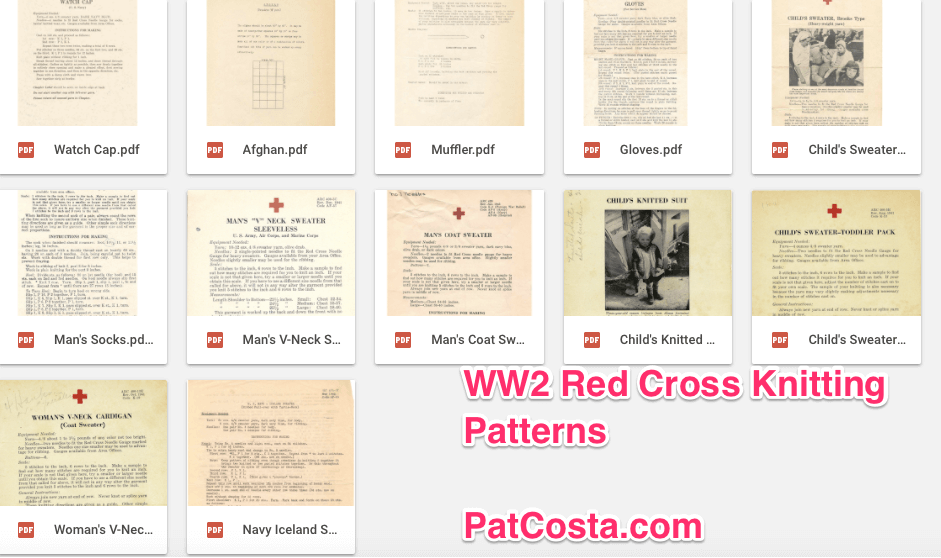
WW2 Red Cross Reproduction Knitting Patterns for WW2 Reenactors
During World War I and again during World War II, the American Red Cross launched nationwide, volunteer-driven knitting campaigns to supply soldiers and war refugees with warm clothing. These volunteer knitters belonged to a Red Cross unit called the Production Corps that also produced bandages and sewn garments (such as pajamas) for veterans and civilian hospitals.
Military knitting patterns were designed to be compatible with soldiers’ and sailors’ uniforms and were required to be knitted in olive drab or navy blue. Production Corps volunteers would also knit from patterns designed for convalescing soldiers, such as the “Walking Cast Toe Sock,” the “Cap for the Bandaged Head,” and the “Man’s Coat Sweater.”
The chart below shows some different patterns for knitting. The Wristlets pattern comes courtesy of the Estate of Ray and Anita Sexton, Oneida, TN (*).
**The pattern calls for 4/8 sweater yarn and has no needle size or gauge. Above are approximations based on the pattern description. The Center for Knit and Crochet, Inc, says:
…the Women’s Bureau decided to specify three standard “Red Cross Needle” sizes, and printed their diameters in inches. Because knitting needles were not yet standardized…
During World War II, the Red Cross Production Corps was by far the most popular unit, with over 3.5 million members, spread throughout 3,304 chapters. Unlike other volunteer jobs, there was no prerequisite training, and recruitment and task assignments were accomplished quickly. The women, and in some cases the men, who volunteered enjoyed the camaraderie and the fact that workrooms were set up not only at chapter buildings, but also at schools, churches, and other public or private facilities for their convenience.
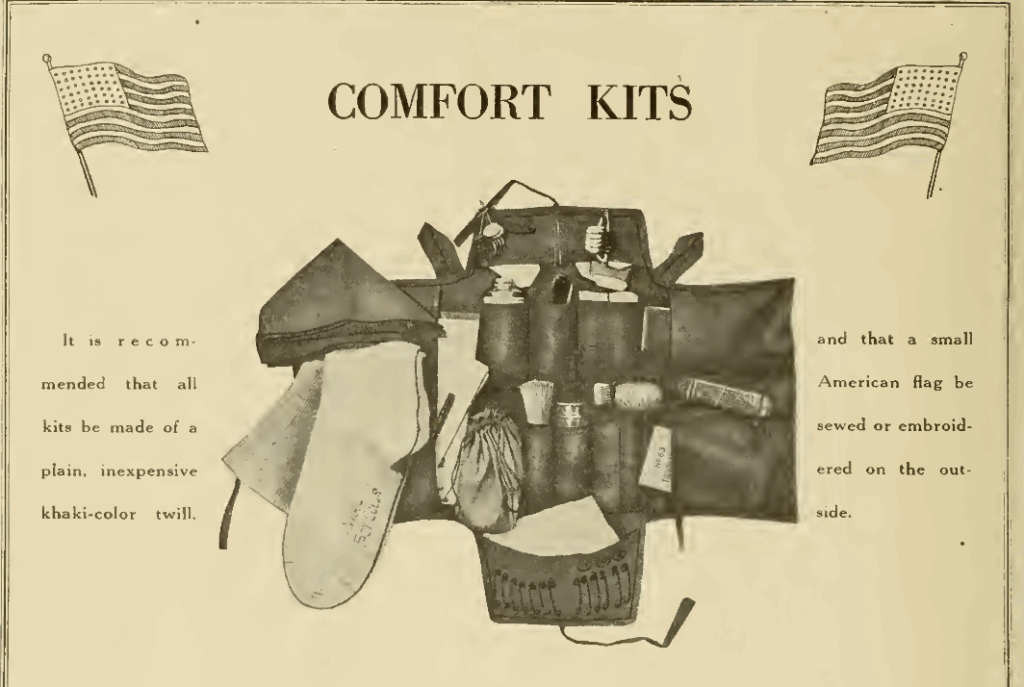
From 1939 to 1946, the volunteers of the Production Corps made: 63,552,649 garments for civilians and the military, 1,403,158 infant garments, 31,237,900 kit bags containing cigarettes, playing cards, soap, etc., and 2,481,951,637 surgical dressings. The Production Corps volunteers were broken down into committees organized by task. They included surgical dressings, sewing, and knitting.
Detailed instructions, patterns, and supplies were issued by the National Headquarters to chapters, and each was assigned a quota to fill. Chapters had volunteers in charge of inspection, planning and supplies, workrooms and equipment, instruction, and packing and shipping
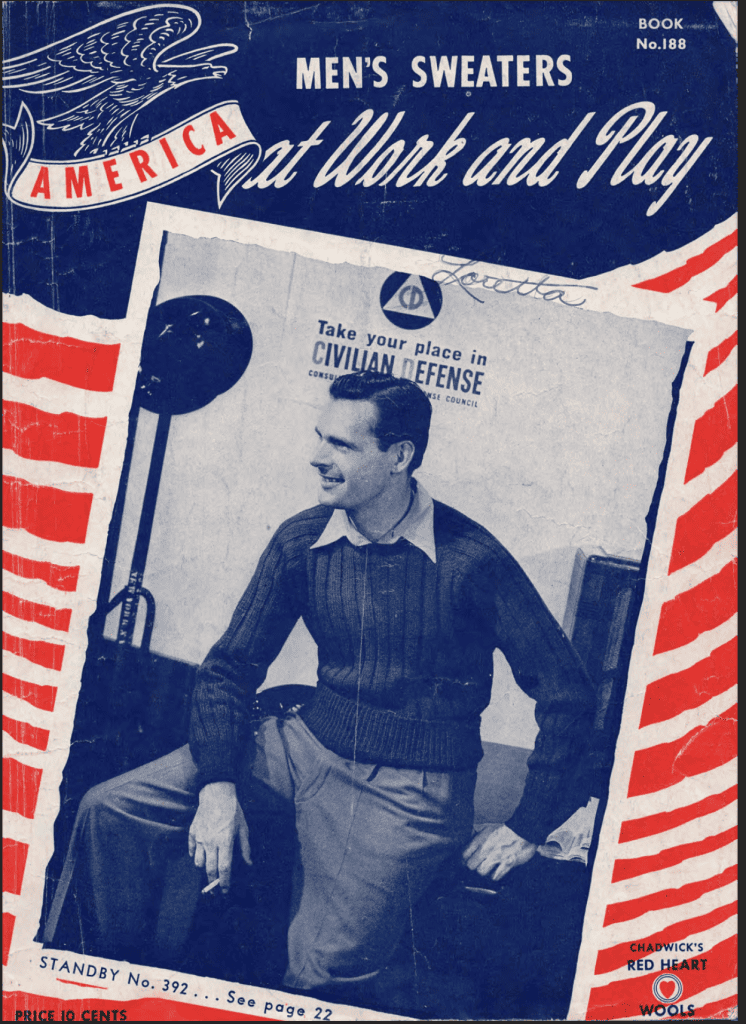
Men’s Sweaters at Work and Play Book No.188
This was a knitting booklet made in 1942 by Chadwick’s Red Heart Wools, a knitting company. It’s 22 pages long and has knitting instructions for the following garments
- The “Blueprint” for America Button-up Sweater
- The “At Ease” Sweater
- The Champion V-neck Sweater
- The Grandstander – a scarf and glove set
- The Match Play Sweater Vest
- The Victory Sweater Vest
- The Defense Worker Button-up Sweater
- The Practical Worker Button-up Sweater Vest
- Top Flighters Sweater Vest
- The Double or Nothing Sweater Vest
- The Football Heroes Pullover Sweater
- The Standby Sweater – which is illustrated on the cover
You can download the Men’s Sweaters at Work and Play Book No.188 as a PDF here.
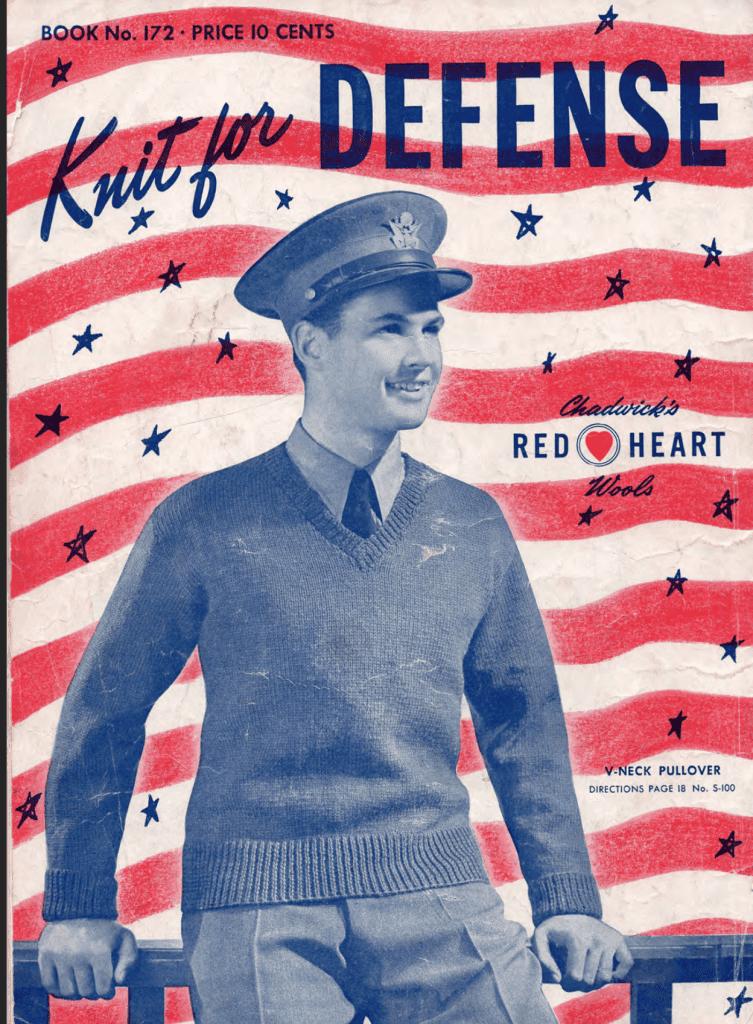
Knit for Defense Book No. 172
This was a knitting booklet made in 1941 by Chadwick’s Red Heart Wools, a knitting company. It’s 22 pages long and has knitting instructions for the following garments. It has instructions for the following patterns
- Round or Turtleneck Pullover
- Crew Neck Pullover
- Plain gloves and scarf
- Chest Protector
- Helmet with or without ear flats – designed to go under an M1 Helmet
- Mittens
- Sleeveless V-Neck Pullover
- Square Neck Pullover and Cap
- Sleeveless High-Neck Pullover
- Trigger Gloves – gloves that have slots just for your thumb and index finger
- Marksman’s Gloves – gloves that stop at the 2nd joint of a finger
- Plain Sock
- Spiral Sock
- V-Neck Pullover
You can download the Knit for Defense No.172 book as a PDF here.
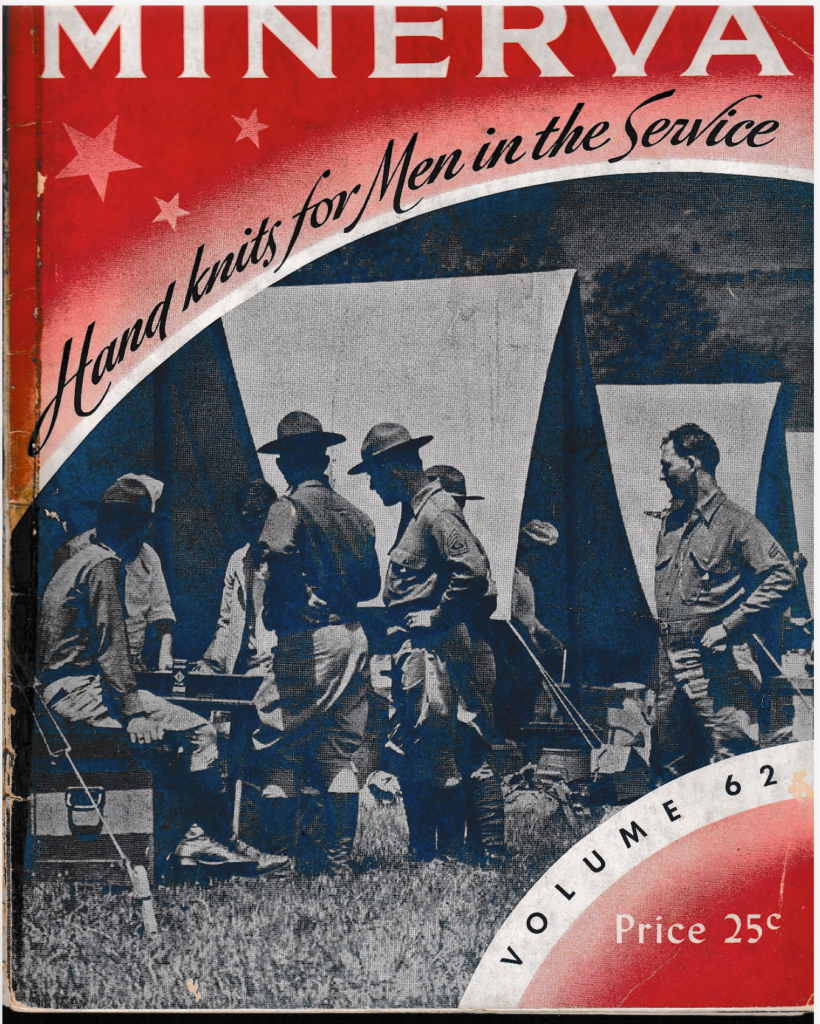
Minerva Hand Knits for Men in the Service Vol 62
The booklet is vol. 62, from 1942, and was published by James Lees and Sons Co. (Minerva Yarns). The company gives each pattern a specific company name and then includes a description of what it is. It contains patterns for
- 6201 Pensacola – Spanish Knitting Worsted Raglan Cardigan
- 6202 Fennimore – Worsted Crew Neck Sleeveless Slip-over
- 6203 Eckhart – Worsted V-Neck Sleeveless Slip-over
- 6204 Baring – Worsted Cap
- 6205 Eckley – Worsted Slip-over
- 6206 Newport – Worsted Cardigan
- 6207 Dorner – Crew Neck slip-over
- 6208 Langdon – Worsted Slip-over
- 6209 Elsdon – FEATHERWEIGHT KNITTING WORSTED SLEEVELESS SLIP-OVER
- 6210 Indian – Worsted Cardigan
- 6211 Curtis – SPANISH KNITTING WORSTED CHEST AND BACK PROTECTOR
- 6212 Aceman – Worsted Helmet
- 6213 Lakehurst – SPANISH KNITTING WORSTED HELMET
- 6214 Knoxville – SPANISH KNITTING WORSTED CAP AND MITTENS
- 6215 Allenford – Worsted Mittens
- 6216 Barwick – Worsted Fingerless Gloves
- 6217 Kelly Field – Spanish Knitting Worsted Fingerless Gloves
- 6218 Jamestown – Worsted Wristlet
- 6219 Lafayette – Spanish Knitting Worsted Marksman’s Gloves
- 6220 Bailen – Worsted Gloves
- 6221 Jefferson – Spanish Knitting Worsted Gloves
- 6222 Randolph Field – Spanish Knitting Worsted Gloves
- 6223 Andeer – Spanish Knitting Worsted Anklets
- 6224 Mineola – Sports Yarn Scarf
- 6225 Handley – Sock Yarn Scarf
- 6226 Fargo – Featherdown Scarf
- 6227 Calais – Featherdown Spiral Bed Socks
- 6228 Richmond – Sock Yarn Socks
- 6229 Gettysburg – Spanish Knitting Worsted Knee Warmers
- 6230 Fairfield – Spanish Knitting Worsted Socks
- 6231 Baldon – Worsted Socks
- 6232 Camp Perry – Spanish Knitting Worsted Socks
- 6233 Trenton – Sports Yarn Hospital Socks
- 6234 Baler – Worsted Sea Boots
- 6235 Inman – Sports Yarn Sleeveless Undershirt
- 6236 Eden – Featherdown Stomach Band
- 6200 Nelson – Featherweight Knitting Worsted Slip over
You can download the full book here.
Practical, Warm Hand Knits for Service Men WW2 Knitting Patterns
The booklet is Volume 318, dated 1940. Below are some images from the booklet and external links that explain more about the patterns.
The book contains patterns for
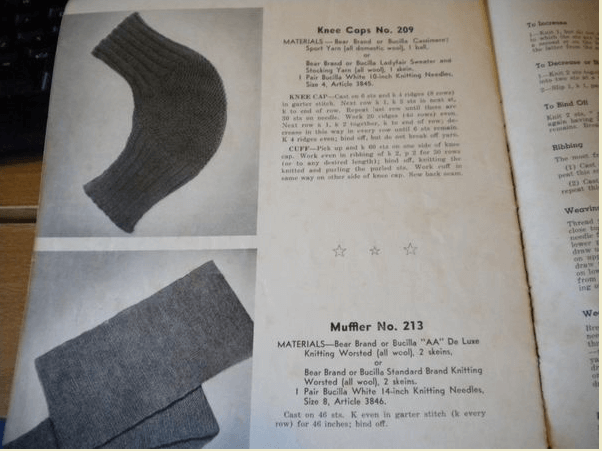
- Approved Navy Turtle-Neck Pullover No. 217
- V-Neck Sleeveless Sweater No. 222
- Heavy Weight Socks No. 216
- Helmet No. 203 (with chest and back protector)
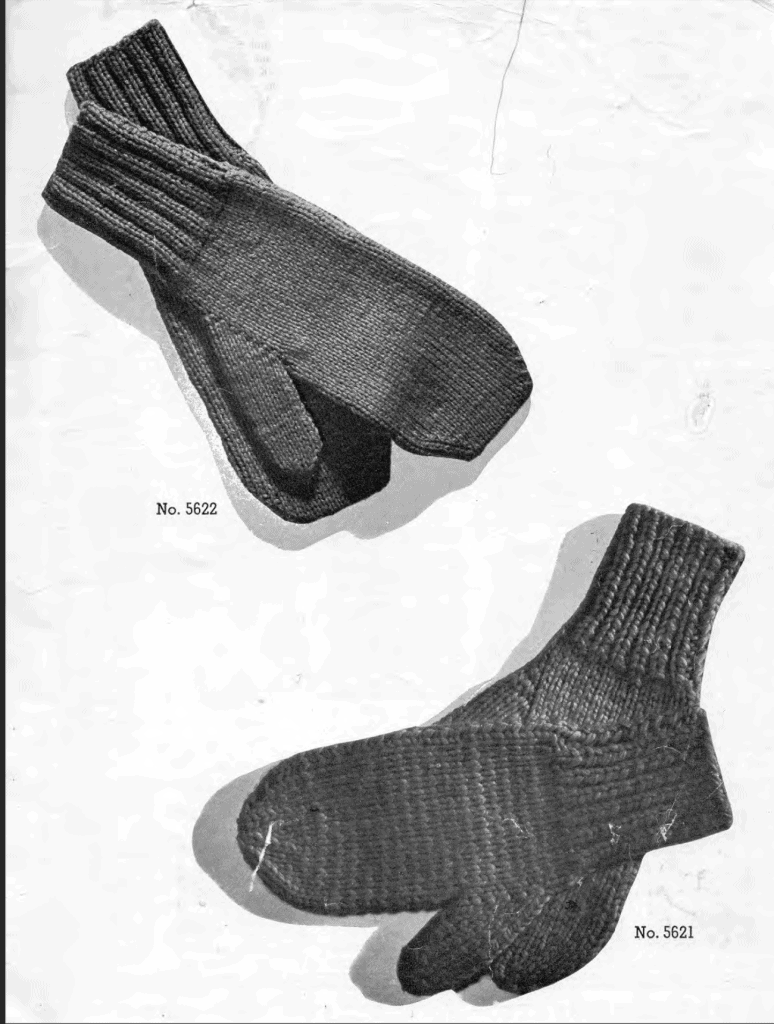
- Mittens No. 211
- V-Neck Pull-over No. 202
- Approved Navy Watch cap No. 218
- Medium Weight Socks No. 206
- Sleeveless High-Neck Sweater No. 200
- Globes No. 2019
- Approved Navy Scarf No. 220
- Army Muffler No. 213
- Wristlets No. 210
- Trigger Gloves No. 208
- Sea Boot Stockings No. 221
 |  |  |
 |  |
You can download the full PDF of the book here.
External Links
The links below are a digitized copy of the content found in the Red Cross knitting document, Warm Hand Knits for Servicemen. Read Me First: WWII Knitting FAQ
| WWII Plain Socks | WWII Hats and Helmets | WWII Mittens and Gloves | WWII V-Neck Sweater |
| WWII Turtleneck | WWII Sweater Vest | WWII Ear Muffs, Wristlets, Knee Caps, Muffler |
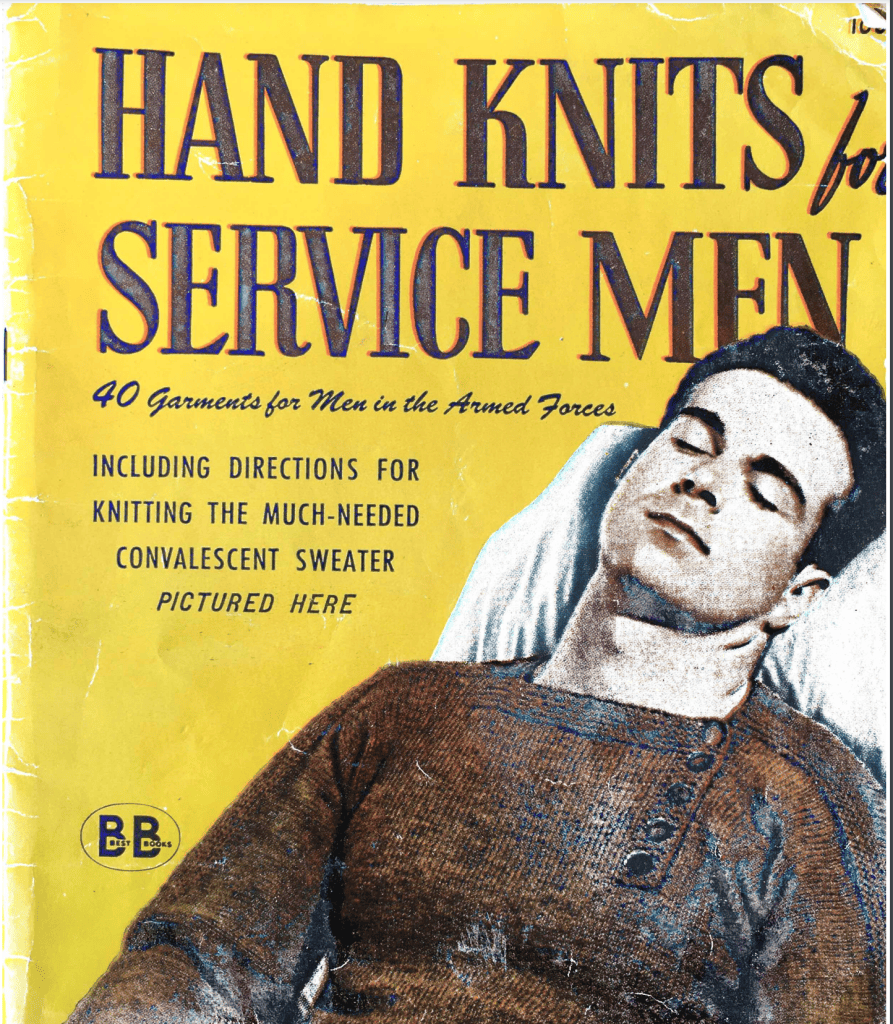
Hand Knits for Service Men – 40 Garments for Men in the Armed Forces
This is a 26-page book that includes 40 different knitting patterns. It was copyrighted in 1944 by Book Productions Industries Inc and published by Ethel Evans.
The book contains knitting patterns for:
- Heavy Turtleneck with Sleeves
- Army-Navy Pullover
- Turtleneck Sleeveless Pullover
- V-Neck Pullover
- V-Neck Service Pullover
- Service Pullover
- Convalescent Sweater Jacket
- Wheelchair Afghan
- Knit Wheelchair Afghan
- Navy Pattern Afghan
- Cap Helmet
- Balaclava Heavy Weight
- Balaclava Light Weight
- Watch Cap
- Navy Gloves
- Rifle Gloves
- Steel Helmet
- Regulation Helmet
- Cap
- Army Mitts
- Army Gloves
- Officers Navy Gloves
- Wristlets
- Trigger Gloves
- Wristlet with Thumb
- Knee Length Socks
- Turtle Neck Tuck In
- Navy Chest Protector
- Navy Scarf
- Slot Mitts
- Air Force Ascot Scarf
- Merchant Marine Rib Pattern Turtle Neck Sleeveless Pullover
- Hospital Bed Socks
Hand Knits for Servicemen can be downloaded as a PDF here.
Ethel Evans is actually the pen name of Ethel Rodman. She is a minor celebrity in the world of knitting and crocheting, as she has published several authoritative books in this field. Her brother is Edward Ray Goetz, a Hollywood producer, songwriter, and musician, who at one time was married to actress Irene Bordoni.
Ethel’s sister was Dorothy Goetz, who at one time was married to Irving Berlin. Ethel and her sister are buried with their parents in Buffalo’s Forest Lawn Cemetery (section 9, Lot 282).
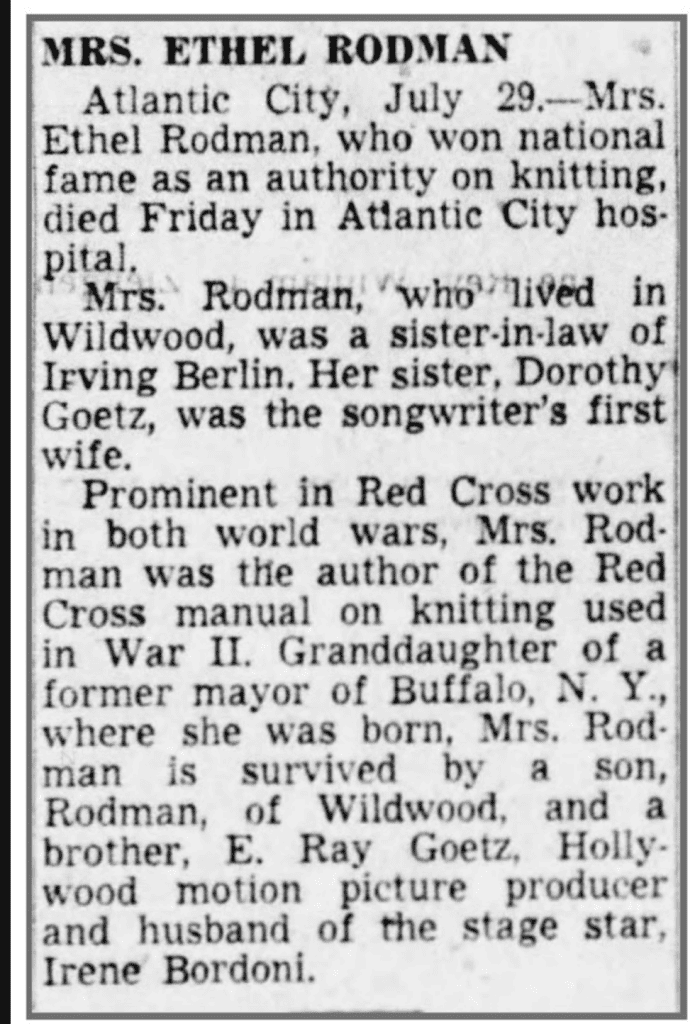
Now, oddly, she has a connection to UFOs. She witnessed a UFO incident called “Incident 88” or “Hackensack Event” because it was reported on Aug 3rd, 1947, in Hackensack, NJ. She sent letters and photos to the Air Force for about a year, but stopped near the end of 1948. Incident 88 has a redacted archived copy that you can see.
Post-War: Jack Frost Two Needle Mittens Vol 56
This is a knitting guide made in 1947 by the Jack Frost Yarn Company. The company itself may have first started in 1928, according to the date it was trademarked.

The booklet contains the following patterns. Much of it seems to be kid-focused, and there may not be much use for WW2 Reenacting, but the Men’s or Lady’s mittens might work
- 2 types of Infant Mittens
- Thumbless Mittens
- 8 types of Classic Mittens
- Ribbed Mittens
- Norwegian-Type Mittens
- Cable-back Mittens
- Braided-cable Mittens
- Speed-knit Mittens
- Striped Mittens
- Ombre Mittens
- 2 types of Lady’s Mittens
- 2 types of Men’s Mittens

You can download the booklet as a PDF here.
British Knitting Instructions
While this page covers US knitting instructions, you can find a listing of British Knitting instructions: 1940s knitting patterns. It includes the following patterns
- Fatigue Cap
- When you’re “off duty” jumper
- The balaclava helmet
- Knitted Turbans
- Spiral-spun waistcoat
- Gloves for women
- Fair Isle gloves and cap
- Bed socks
- Victory jumper
- Pants and vest in mesh stitch
- Men’s mittens
- Mittens for women
- Fishnet stockings
- A practical pullover
- “A Happy thought” tea-cosy
Sirdar Design No. 1237
Sirdar is a British Knitting company founded in the 1800s. For a history of the company, this article from Knit and Nibble is pretty condensed. Sirdar produced knitting patterns such as the pullover with a collar and a vest, seen below. You can download this pattern here. Sirdar also has copies of 40s patterns (among other eras) in their Heritage section here. Many of which would have been found amongst the civilian and army populations of World War II.

Lister Lavenda Hand Knitwear for the Services
This is another British company, Lister & Co. Ltd, that produced knitting patterns. You can download the book here. It contains the following
- MEN’S GLOVES ON 2 NEEDLES
- MEN’S MITTENS ON 2 NEEDLES
- BED SOCKS ON 2 NEEDLES
- HOSPITAL STOCKINGS ON 2 NEEDLES
- KNEE CAPS
- SPIRAL SEA BOOT STOCKINGS
- SPIRAL SOCKS
- FLYING JERSEY
- HELMET WITH HOLES FOR EARPHONES
- CAP SCARF


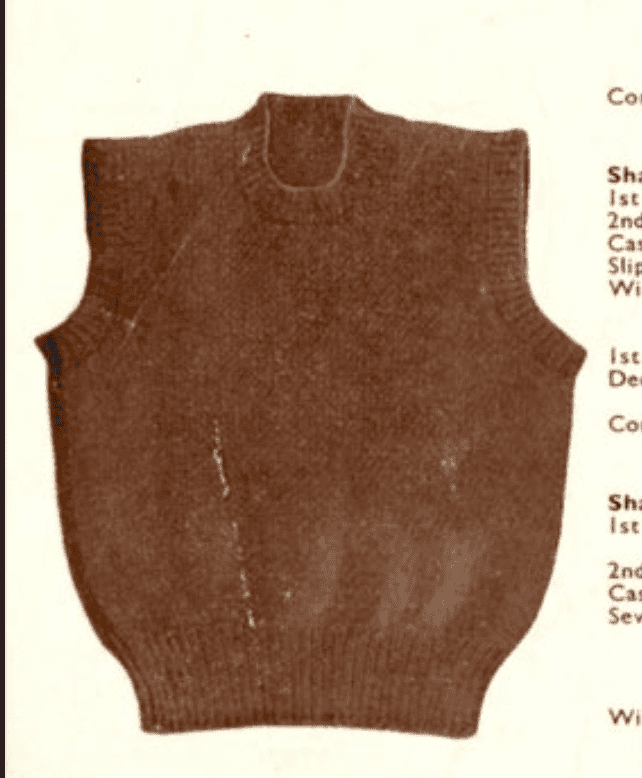
Canadian Red Cross Knitting Patterns
The book was issued by the Canadian Red Cross Society in February 1940 and is 16 pages long. It contains at least 17 different patterns for the Army, Navy, and Air Force.
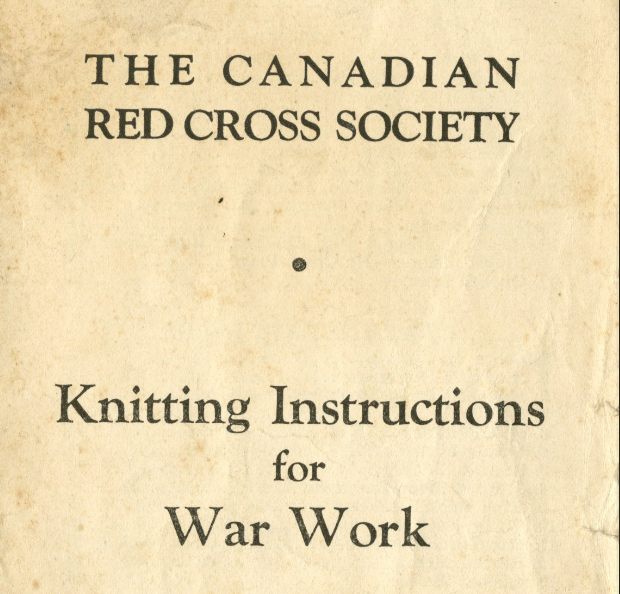
You can download the book here: The Canadian Red Cross Society: Knitting Instructions for War Work
What The Army Needs
- Army Socks
- Bed Socks
- Knee Caps
- Wristlet
- Half Mitts
- Broadcast Wristlets
- Rifle Mitts
- Whole Mitts
- Plain Knitted Scarves
- V-neck Sleeveless Sweater
- High Neck Sleeveless Sweater
- Alternate V Neck Sleeveless Sweater
- Turtle Neck Heavy Sweater with Sleeves
- Plain Helmet
- Balaclava Helmet with Chest and Back Piece
- Ribbed Helmet – No Chest Piece
- Quebec Helmet
What The Navy Needs
- Socks
- Seaman’s Stockings
- Seaman’s Long Stockings
- Wristlet
- Half Mitts
- Whole Mitts
- Plain Knitted Scarves
- V-neck Sleeveless Sweater
- High Neck Sleeveless Sweater
- Turtle Neck Heavy Sweater with Sleeves
- Balaclava Helmet with Chest and Back Piece
- Ribbed Helmet – No Chest Piece
- Quebec Helmet
What The Air Force Needs
- Socks
- Wristlet
- Broadcast Wristlets
- Whole Mitts
- Plain Knitted Scarves
- Regulation V-neck Sleeveless Sweater
- High Neck Sleeveless Sweater
- Turtle Neck Heavy Sweater with Sleeves
- Aero Cap
World War One Knitting Garments
I wanted to provide a brief section on WW1 Era Knitting Garments and instructions.
Vintage Reveries has a few examples, such as socks, helmets, wristlets, and sleeveless sweaters. These all come from the July 1917 Modern Priscilla Needlework magazine. For a cleaner copy of Helmet A, Helmet B, and Helmet C, you can see this HJS Studio WW1 Patterns guide.
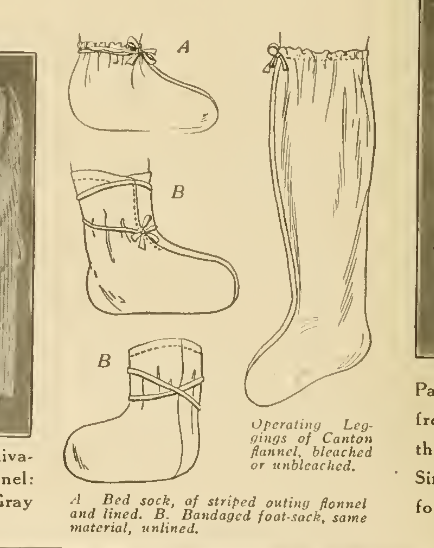
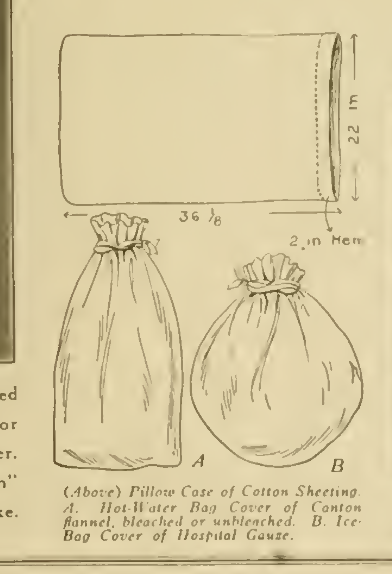
Priscilla War Work Book Comforts for Soldiers and Sailors 1917 – Includes patterns for: Mufflers, Sleeveless Sweaters, Knitted Helmets (types 1 and 2), Medium Size Man’s Socks, Thumbless Mittens/Wristlets, Thumbless Mittens, Hospital Bed Socks, and Balaklava Sleeping Caps.
Also includes a neat discussion on the needs for hospital and surgical gowns, hospital bed shirts, pajamas, bed socks, operating leggings, convalescent gown, operating gowns, hot water bag covers, and ice bag covers.
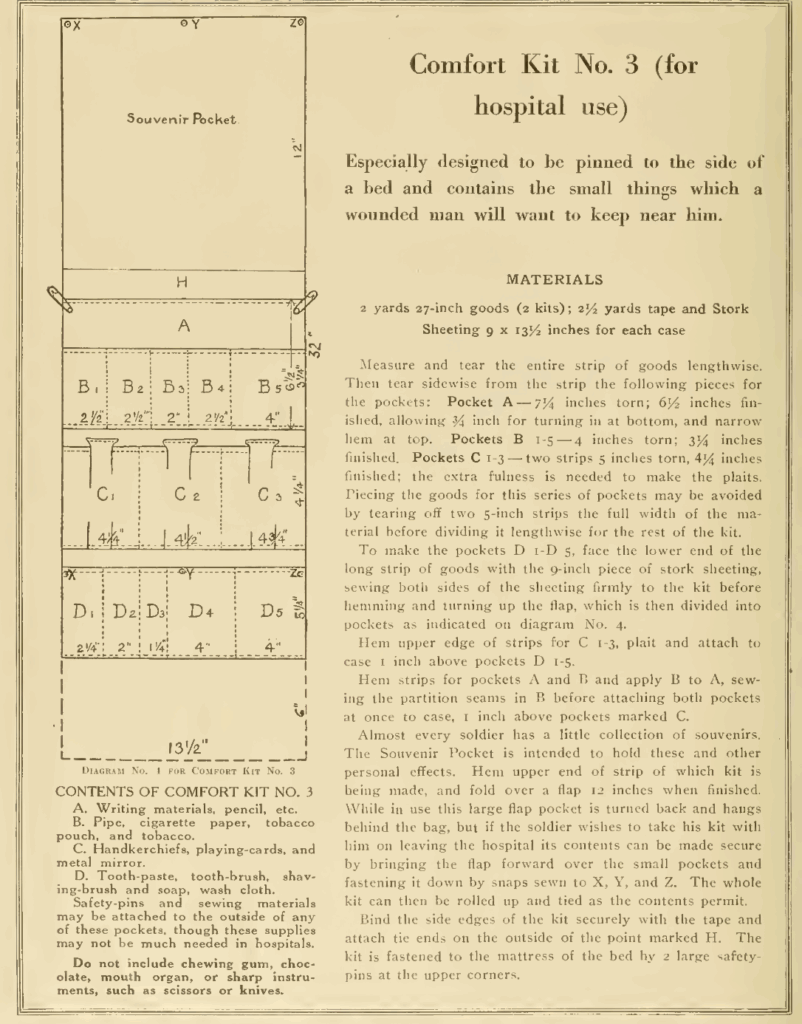
In addition, it shows how to make comfort kits (types 1, 2, and 3) via a pattern.

It also has a few Boy Scout items, but since that’s not really related to WW1, I’m not adding the images.
The US Militaria Forum has 4 pages of discussion around knitted WW1 garments.
The University of Pennsylvania has a list of knitting and crocheting PDF books from the 1940s to the 1940s. These seem primarily based out of the UK and Europe and focus mostly on civilian clothing, but there might be some crossover to the military.
Fleisher’s knitting & crocheting manual / the Fleisher Yarns 1918 – The first 30 or so pages focus on service-related items (search for “service” or “army). They have a neat section on different kinds of blankets to make, as well as sweaters, hats, scarves, socks, and wristlets.
World War One Red Cross Socks and Wristlets: The Red Cross issued a few patterns. Attached is a zip file with instructions. Comes from: Knitting America: A Glorious Heritage From Warm Socks to High Art by Strawn, Susan. Voyager Press, 2007.
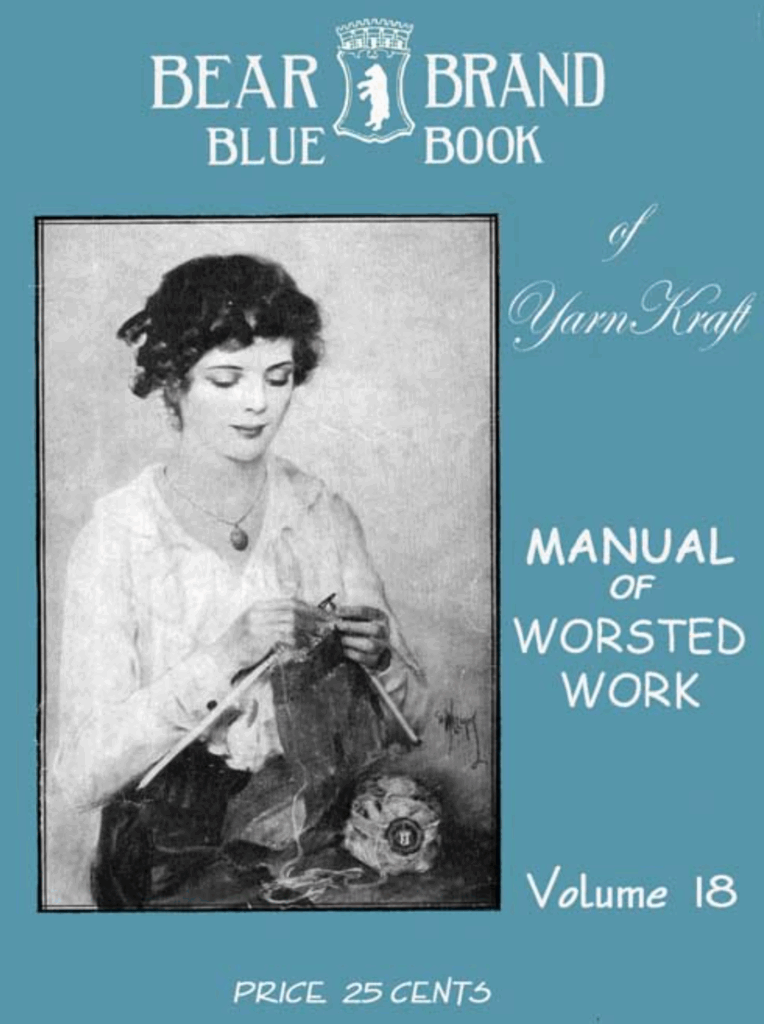
Bear Brand Blue Book No. 18 1918 – Descriptions of how to crochet and knit, as well as showing different kinds of stitches. It has a few items for soldiers and sailors in World War I. Hilariously, it includes a dog sweater pattern (page 128).
- Helmet No. 8111
- Wristlets No. 8049
- Wristlets No. 8110
- Muffler No. 8048
- Sock No. 8125
- Bed Sock No. 8112
- Knitted Knee Cap No. 8114
- Trench Cap No. 8115
- Abdominal Band No. 8054
- Marksman’s Glove No. 8141 (instructions on page 127)
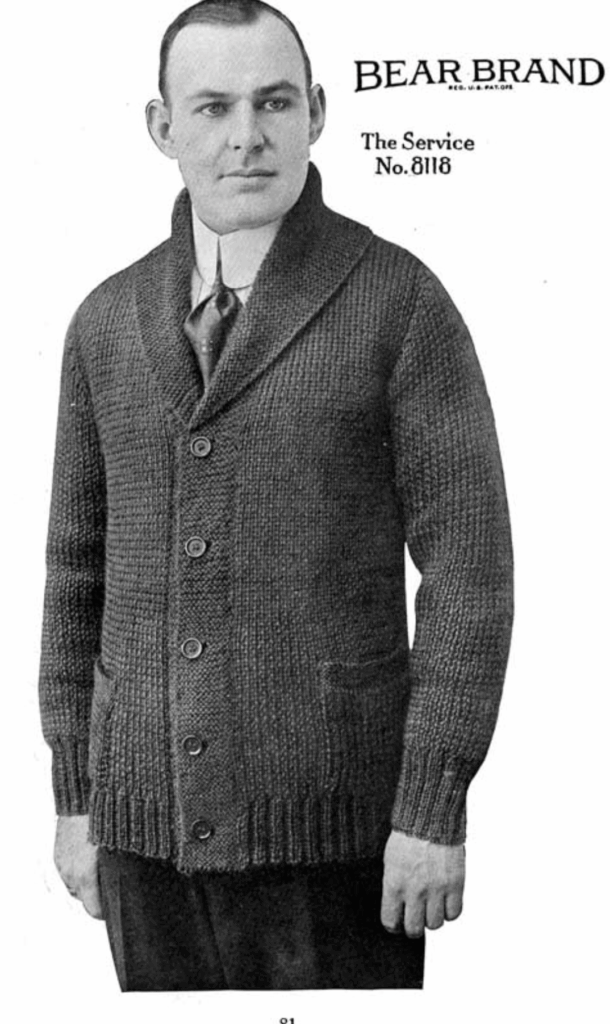
- Service Sweater No. 8118 – Seems to be made for civilians in mind, but could be used for military.
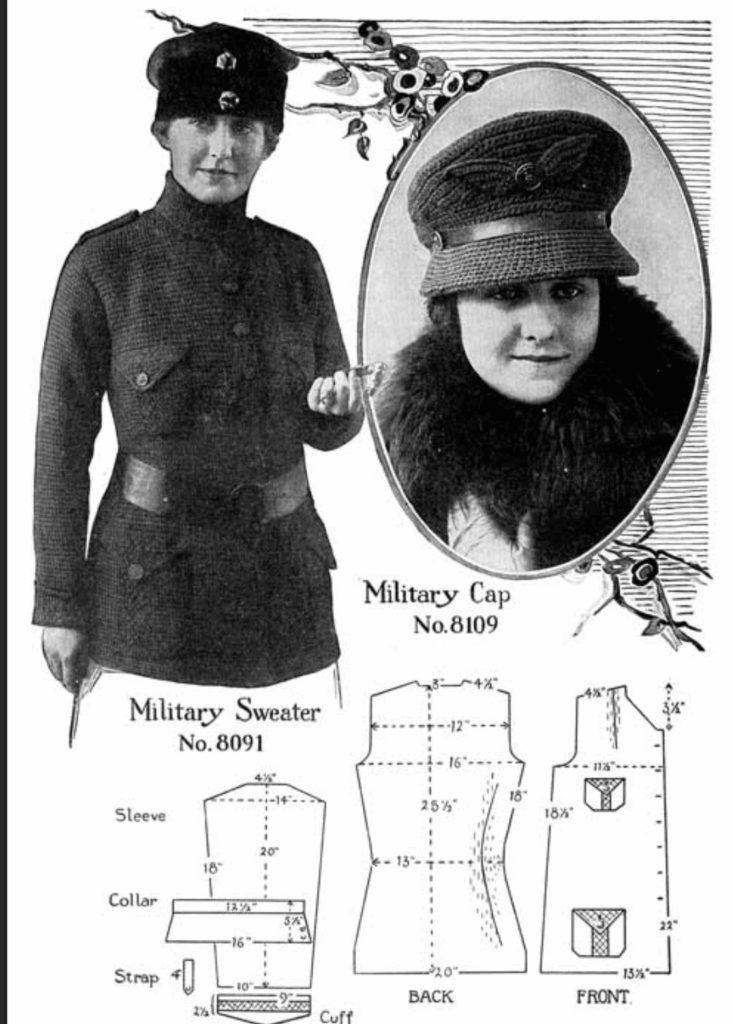
- Military Cap No. 8109 – Looks to be a stylish wool hat for women.
- Military Sweater No. 8091 – Looks to be a stylish sweater for women.